|
| | |
|
|
| 
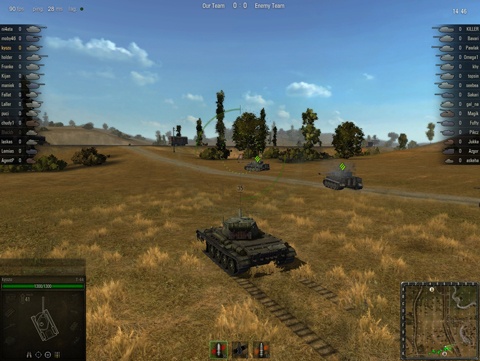
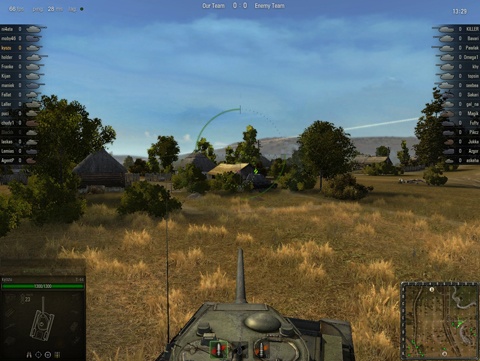
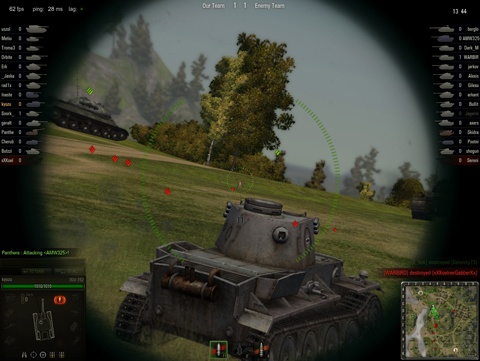
De gameplay valt te vergelijken met die van een FPS maar dan met tanks, een soort Battlefield zonder infanterie. Wanneer je voor het eerst inlogt in het spel zul je zien dat er een aantal tanks in je garage staan. Het betreft hier light tanks uit elke op dit moment speelbare landen. Elk land heeft zijn eigen tank tree, deze tree bestaat naast light, medium en heavy tanks ook uit tank destroyers en SPG's. Om een tank te kopen heb je 2 dingen nodig: experience en credits. Deze zijn te verdienen door aan battles mee te doen.
Net zoals veel MMO's werkt het spel met een experience system. Met elke battle waar je aan meedoet verdien je experience. Deze experience verdien je door vijandelijke tanks te beschadigen of te detecteren (scouten). Vervolgens kun je deze experience uitgeven om je huidige tank te upgraden of misschien wel om te sparen om een betere tank te kopen. Zie voor gedetailleerde uitleg het kopje Experience.
Het spel is opgebouwd uit verschillende "Tiers" (lees: levels), elke keer als je een beter tank koopt wordt je weer in een betere tier gezet waardoor je weer andere tanks en betere tegenstanders tegenkomt. Als je een tank uit Tier 2 hebt zul je bijvoorbeeld tanks uit Tier 2 en hooguit tier 4 tegenkomen, dit is ingebouwd om het spel eerlijk te houden.
Het is de bedoeling dat je samen met je team het vijandelijke team uitschakelt of hun basis overneemt. Op dit moment is het mogelijk om met tanks uit Duitsland, Rusland, Amerika en Frankrijk het slagveld te betreden. In je team kunnen tanks uit elk land zitten, het is dus niet zo dat je als Duitse tank alleen tegen tanks uit Rusland en Amerika kunt vechten. Het spel zit strategisch in elkaar en rushen heeft in veel gevallen ook weinig nut, er is een map ingebouwd in het spel en door het gebruik van de CTRL knop en je muis kun je punten op de kaart aanklikken om zo je teammaten te seinen (een artillery bijvoorbeeld).
De game is gebaseerd op zogenaamde microtransacties, kleine uitgaven binnen het spel. Daarvoor moet je wel eerst gold kopen, dit kan op de site wanneer je inlogd. Met het gold kun je verscheidene dingen doen, zo kun je premium tanks aanschaffen, Premium Account inschakelen, garage uitbreiden en nog veel meer.
Op dit moment zijn de volgende gold packs beschikbaar:- 30000
 - € 99.95 - € 99.95 - 14500 - € 49.95
- 5500 - € 19.95
- 2500 - € 9.95
- 1500 - € 6.95
Er zijn genoeg mogelijkheden om te betalen van CC tot Paypal tot iDeal en zelfs met de telefoon.
RetailboxOok is er sinds een tijdje de mogelijkheid om een retail versie van het spel te kopen waarbij je het volgende ontvangt:
Invitation code (enkel te gebruiken op nog niet bestaande accounts):- 3 dagen premium account
- 1000
Bonus code (werkt zowel op oude als nieuwe accounts):
| |
|
|
| 
What are the system requirements? | Minimum settings | Medium settings | Maximum settings | | Operating system: | Windows 2000/XP/Vista/7 | | Processor: | 2.2 GHz | 3 GHz | Dualcore 3 GHz | | Geheugen: | 1.5GB / 2GB | 2GB / 3GB | 4GB of meer | | Videokaart: | Nvidia 6600GT
ATI X800 | Nvidia 8600GT
ATI HD3850 | Nvidia 9800
ATI 4850 | | Internet connection: | 128 Kbps | 128 Kbps | 1024 Kbps of meer (voice chat) |
What types of armored vehicles are presented in the game?World of Tanks features armored vehicles from America, Germany, France and the Soviet Union that were designed and produced during the period between the early 1930’s and up to the Korean war (1950). Gamers can choose from light, medium, and heavy tanks as well as tank destroyers and long-range self-propelled guns (SPGs). As well as real tanks that saw service in battle, the game includes prototype vehicles, such as the German E Series tanks and most of the French tanks.
Are battles fought by one-nation teams?Before each battle, the game will randomly divide players into two teams according to the level and the development stage of their vehicles in an attempt to make both teams equal in overall power. This means that a team may include tanks from all different nations. The balancing system is often referred to as the Match Maker (MM) and is create to ensure equal chance of both teams during random battles.
How realistic is WoT??The game keeps the balance between realism and gameplay. World of Tanks is not a hardcore simulator; gamers won’t have to spend their time on getting used to controls. The game’s difficulty rests upon applying your tactical skills and coordinating moves with your teammates.
What types of clan battles does the game include? The game currently cosists of several game modes. The main game mode are Random Battles. They are the most commonly played battles which you can join either alone or in a platoon of up to 3 people.
Random battles can be played in three modes: standard battle, assault or encounter. Each battle mode has its own specific rules. The modes have been described in detail in the newcomers guide.
Apart from random battles there are also company battles during which two organized teams face each other on random maps. The training battle mode allows players to face each other without risking spending credits on repair of the vehicles. Be warned though, the consumables used and shells fired during training battles are not reimbursed, you will have to pay their full value if they are used. The last battle type are special battles which are reserved for pre-arranged battles such as Clan Wars battles.
How will the Clan Wars be arranged?In Clan Wars, there is a global map divided into many provinces. To start their activity on the map, every clan has to capture one of landing provinces. If a province is not occupied by others, the clan will get it without a fight, whilst an occupied province will have to be fought for. Details regarding Clan Wars can be found in several further pages of the guide.
Will captured provinces provide clans with resources?Each province generates a certain amount of gold to the owner of the province for each they they are holding it. The amount of gold generated by a province does not change, thus strong clans tend to fight for the richest provinces, while the less rich provinces are left for clans without as much skill, members or dedication to be able to conquer and hold them.
How will clans arrange battles?Every clan has a certain amount of “chips” equal to the number of its members. By putting a chip on a chosen province, a clan displays its intention to capture it. If another clan wishes to capture the same province or if the province belongs to another clan, the two clans will engage in a battle for it. Clan Masters can declare attacks on neutral or enemy provinces once per day, and a corresponding number of battles are scheduled and take place accordingly.
| |
|
|
| 
Trainen
Als je een nieuwe tank aanschaft kun je kiezen uit verschillende crew statussen, 50% (gratis) 75% (20k credits per crewmember) en 100% (200 goud per crewmember), dit heeft effect hoe je tank rijdt, hoe snel het reloaden gaat, hoe snel je aimed en hoe zuiver je schiet. Een crew die nog geen 100% is train je door er games mee te spelen (Het crewtrainen gaat sneller met een premium account).
Secondary skills
Zodra een crewmember de 100% bereikt is het mogelijk een secondary skill uit te kiezen, er is keuze uit Cammo / Firefighting / Repair. Dit begint op 0% en gaat door tot 100%, het effect van deze secondary skill op de uiteindelijk uitvoering ervan wordt gemiddeld over de complete crew (Dus als je 2 crew members op 100% voor cammo hebt, en de andere 3 heb je voor iets anders getrained is je tank dus geskilled voor 40% op Cammo) . Zodra je 100% bereikt op een secondary skill kun je een volgende kiezen (Het is dus mogelijk om meerdere secondary skills op een crewmember te hebben).
Omtrainen
Een tank crew moet getrained zijn voor het gebruik van een bepaalde tank, in een andere tank krijgen ze een penalty waardoor ze extreem veel slechter werk leveren! In de Personal File van een crew member kun je vinden voor welke tank een crew getrained is. Als je in hun File naar training gaat, kun je de persoon omtrainen naar een andere tank van dezelfde klasse, als een crew member op 100% zit, zal de retraining die 20.000 credits kost, een drop van 10% naar 90%, dit betekent dus dat de crew voor de nieuwe tank op 90% kennis zit, een gratis retraining zal ze naar 75% terugbrengen. Als je echter naar een andere klasse tank gaat (Bijvoorbeeld SPG > Heavies), zal de drop groter zijn, voor 20.000 credits zal hij terugvallen naar 80%, en voor niks naar 60% van de huidige crewexperience. Zodra de crew geretrained is, is hij te gebruiken in de nieuwe tank, de secondary skills blijven bij de retraining behouden! en deze zullen dus effect hebben op de tank.
Verschillende typen Crew
 | De Commander is verantwoordelijk voor het spotten van enemy tanks. Ze hebben eveneens invloed op de view range van je tank, hoe hoger het level van de Commander hoe hoger je view range. Daarnaast geeft hij bonussen aan de primaire skill van de crew. Wanneer de Commander dood is worden er geen bonussen uitgedeeld en neemt je view range af. |  | Drivers zijn verantwoordelijk voor de controle over je tank. Hoe hoger de skill van de Drivers hoe fijner je bochten kunt nemen en met minimale snelheidsverlies. Daarnaast zul je met een betere Driver sneller kunnen accelereren. Wanneer de Driver dood is heeft dit een negatieve invloed op de maximum snelheid, traverse speed en acceleratie van je tank. |  | De Loaders zijn verantwoordelijk voor de tijd van het laden en bepalen dus eigenlijk voor een deel je RoF (rate of fire). De dood van één of beide Loaders heeft een lagere RoF ten gevolge. Daarnaast zal het laadproces mogelijk gereset worden wanneer één of beide gedood worden tijdens het laden. |  | De Gunner is verantwoordelijk voor het aimen en vuren van de tank. Het aimen zal sneller gaan als de Gunner een hoger level heeft. De dood van een Gunner heeft als gevolg dat de aim tijd toeneemt. Wanneer een Gunner dood gaat wanneer je aan het aimen was dan kan dit mogelijk gereset worden. |  | Radio Operators onderhouden de contacten met de allies en effectief tot hoe ver je je medespelers op de minimap kunt zien. Op de basis skill van 50% zal de radio range op 75% zijn werk doen. Wanneer de Radioman neergeschoten wordt zal de radio range afnemen tot 50%. |

| |
|
|
| 
Er zijn in World of Tanks 2 soorten experience: tank gebonden experience en free experience. Tank gebonden experience is niet vrij te besteden en geldt enkel voor de tank waarmee je het verkregen hebt.
Experience vergaar je door deel te nemen aan battles. Tanks beschadigen, scout (spotten) en cappen leveren experience op. Het team heeft ook een gezamelijke pot met exp die groter wordt naarmate meer damage overall gedaan wordt en dit wordt eveneens verdeeld over elke speler in je team. Cappen wanneer er nog een redelijk aantal van de tegenstander leeft terwijl je team sterk genoeg is levert je dus beduidend minder experience op. Hoe meer damage je doet hoe meer experience je vergaard dit omdat er geen kill bonus bestaat.
Free experience verkrijg je gratis bij elke battle die je speelt. Je ontvang 5% free experience van de experience die je in de battle verdient hebt. Dit vrije exp kun je, zoals de naam al doet vermoeden, ook vrij besteden op elk van je tanks. De meesten die al langer spelen gebruiken het gespaarde free experience voor upgrades voor volgende tanks, op die manier kun je je tank vaak al helemaal upgraden bij aanschaf.
Wanneer je je tank elite maakt, dit wil zeggen alle upgrades gekocht die er te kopen zijn voor de desbetreffende tank, kun je het verkregen exp om laten zetten in free experience door middel van gold. De ratio om om te zetten ligt op 25 exp voor 1 gold. Ook kun je ervoor kiezen om alle exp die je binnen krijgt met de tank om te laten zetten naar experience van de crew waardoor deze sneller levelt. Dit kan echter ook alleen wanneer de tank elite status heeft.
| |
|
|
| 
World of Tanks is een free to play MMO maar berust op zogenaamde microtransacties. Je koopt dan gold wat je ingame kan besteden aan een verscheidenheid aan dingen, van 100% crew tot equipment. Daarnaast kun je ook een Premium Account kopen. Dit biedt een aantal voordelen, zo kun je een Platoon maken (om er een te joinen heb je geen Premium Account nodig) en krijg je per battle 50% exp en credits.
Er zijn verschillende lengtes waaruit je kan kiezen:- 12 maanden - 24000
- 6 maanden - 13500
- 30 dagen - 2500
- 15 dagen - 1250
- 3 dagen - 650
- 1 dag - 250
| |
|
|
| 
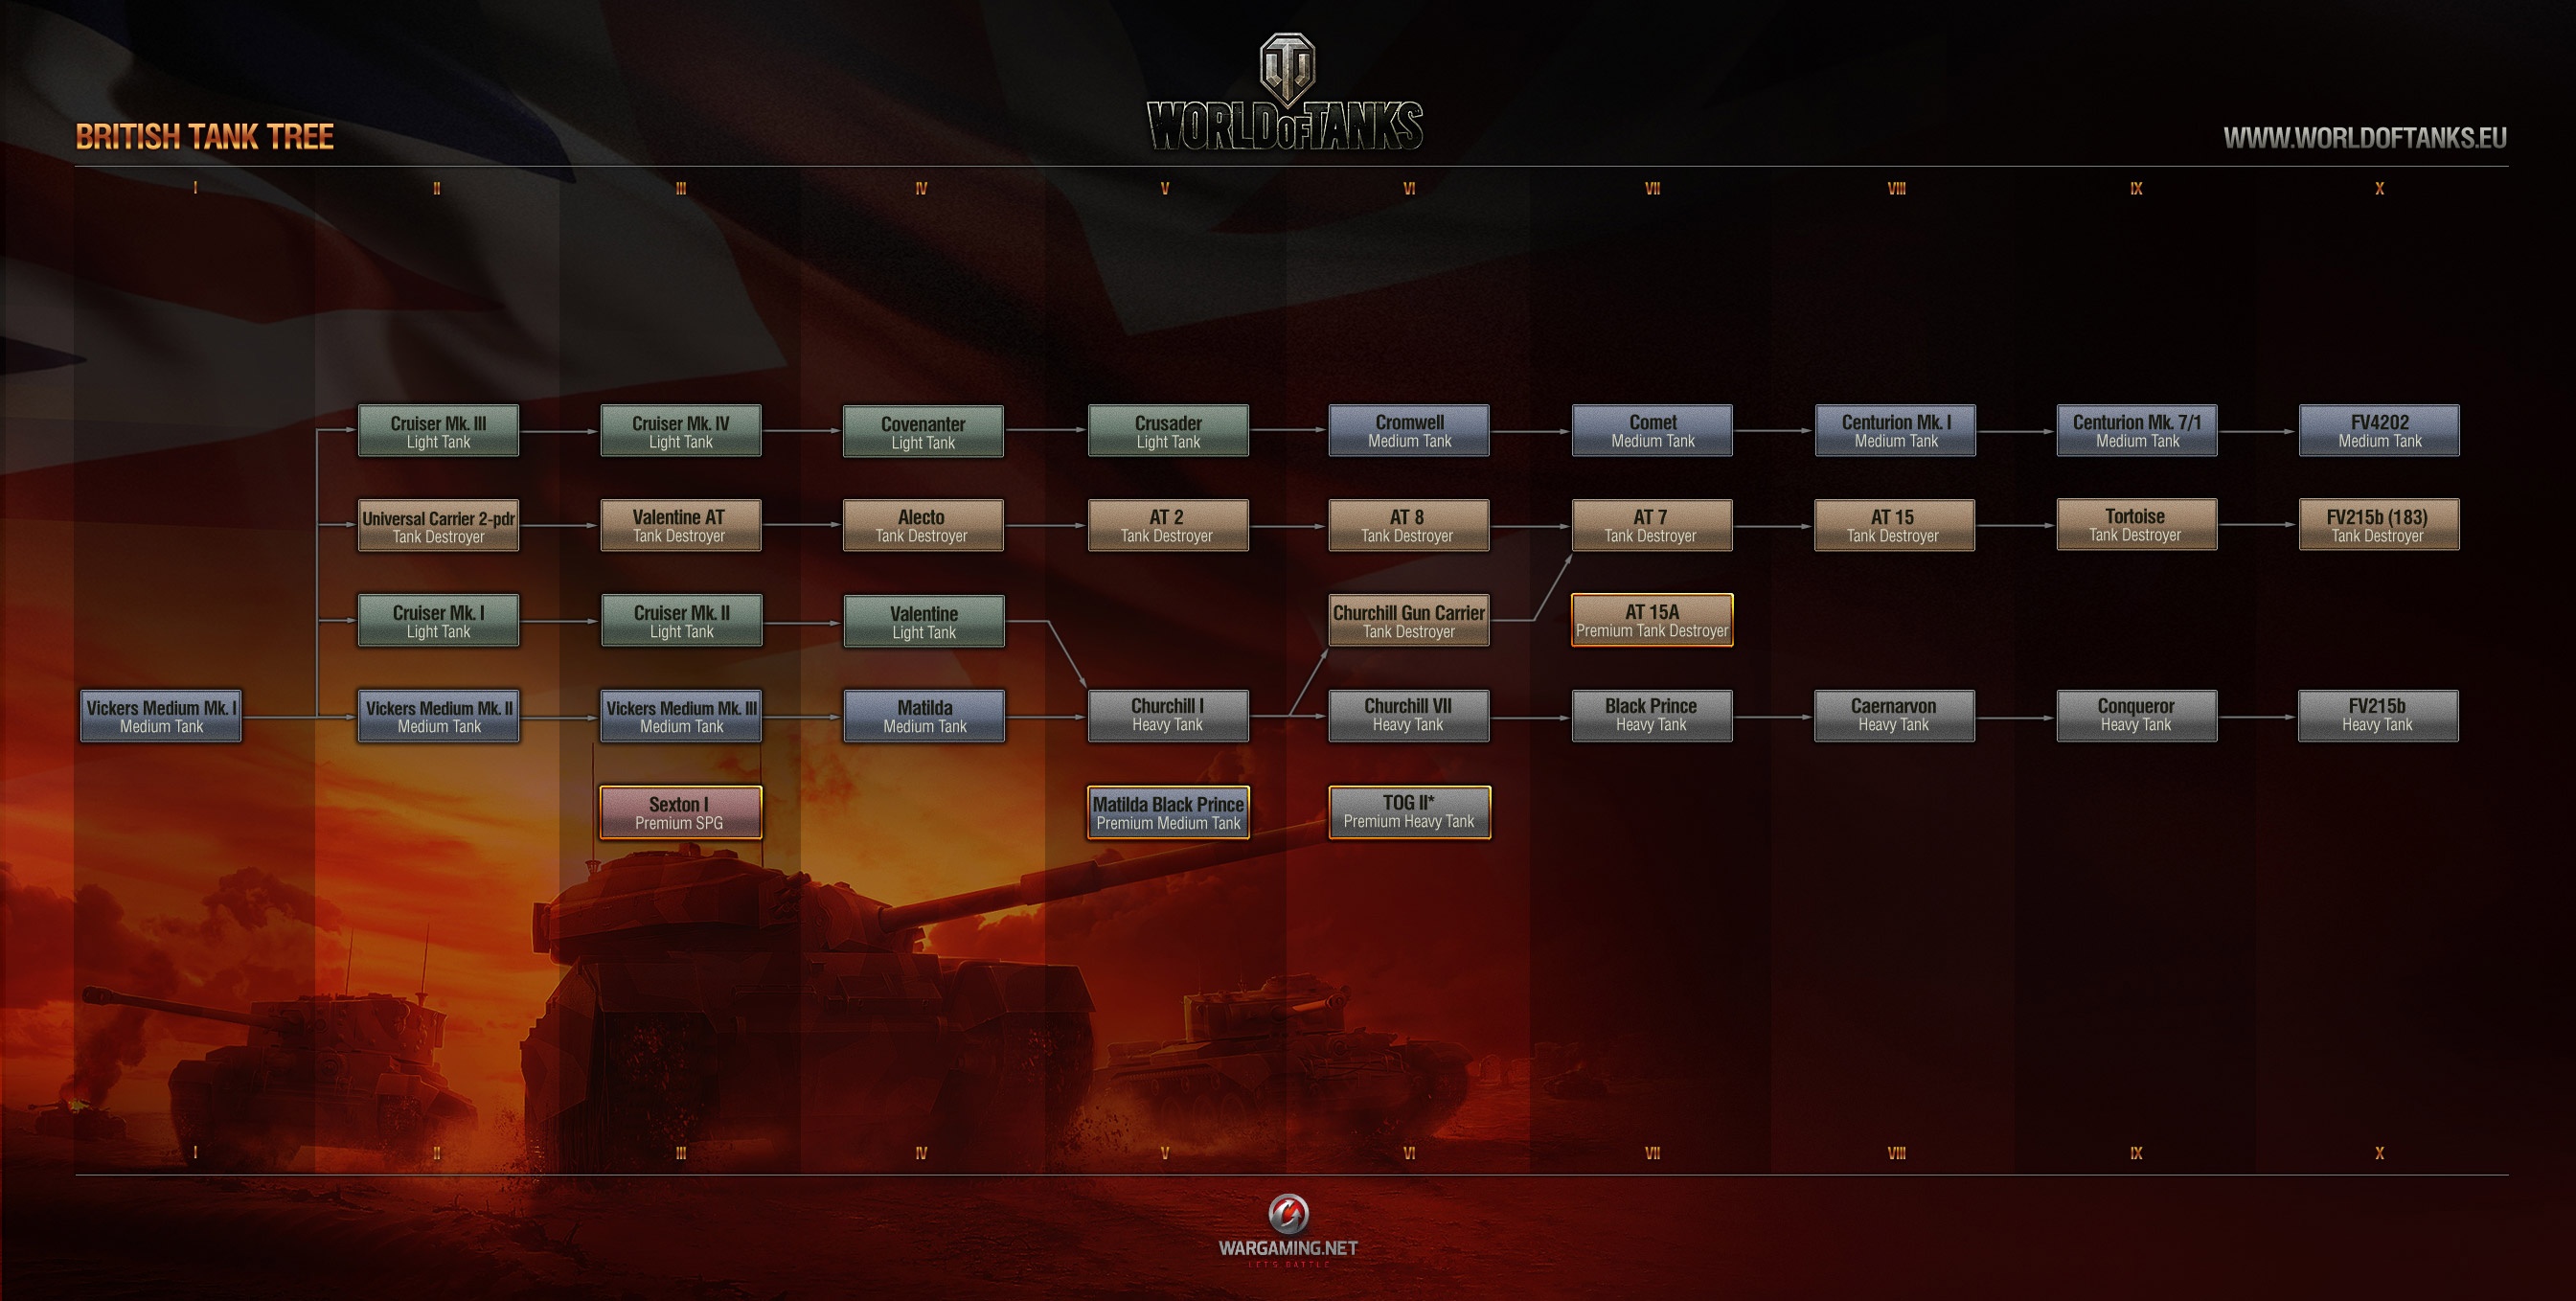
Bekend was dat de Amerikaanse tank tree flink op de schop zou gaan maar inmiddels is bekend gemaakt dat alle huidige trees grote veranderingen zullen ondergaan. Het zal in kleine stappen gaan en het zal een proces zijn dat weken tot maanden zal duren. Het artikel van Wargaming: Full Tech Trees Revised and Improved.
Een overzicht van de volledige tank trees die zich op dit moment in het spel bevinden:
German Tanks Full | French Tanks Full | USA Tanks Full | USSR Tanks Full | BritshTanks | Chinese Tanks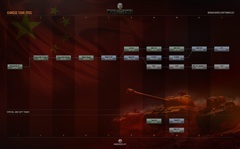 |
| |
|
|
| 
Battle hero achievements worden uitgedeeld aan, zoals de naam al doet vermoeden, de spelers die bepaalde doelen hebben gehaald en daarmee heroes van de battle waren. Per battle kan er van elke achievement maar één zijn die de achievement gehaald heeft, wel kun je meerdere achievements in één battle verkrijgen. Deze achievements leveren tevens meer credits op.
 | Confederate
Hit more enemy vehicles than any other player on your team (at least 6), which are subsequently destroyed by another player. |  | Defender
Reduce the amount of enemy capture points on a friendly base by 70 or more. |  | Invader
Capture the maximum number of points from the enemy base, but not less than 80. The achievement is granted on successful base capture, including only the points that were part of the base capture. |  | Scout
Detect more enemy tanks and self-propelled guns than anyone else on your team (at least nine). The achievement is granted to the winning team only. |  | Sniper
Achieve at least 85% hits out of a minimum of ten shots fired with the potential damage of 1,000 HP and more. No team hits allowed, non-penetrating hits included. |  | Steel Wall
Receive the most hits (at least 11) of any player on your team, with potential damage of at least 1,000 HP, and survive. |  | Top Gun
Destroy more enemy vehicles than any other player on your team (at least 6). |

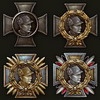
Epic achievements zijn speciale medals die je kunt verdienen door bepaalde doelen te halen. Deze zijn net wat lastiger dan Battle Hero achievements maar worden niet publiekelijk aan het eind van een potje in het resultatenscherm getoond.
 | Billotte's Medal
Awarded to players who destroy at least one enemy vehicle and survive in the battle to victory despite receiving at least five different critical hits (including loss of crew members) and 80% or more loss of hit points. |  | Burda's Medal
Awarded for the destruction of five or more enemy self-propelled guns with a tank or Tank Destroyer. |  | Fadin's Medal
Awarded for destroying the last enemy vehicle in the battle with the last shell remaining in the player's tank. |  | Halonen's Medal
Awarded for destroying three or more enemy vehicles with a Tank Destroyer. The targets must be at least two tiers higher than the player's vehicle. |  | Kolobanov's Medal
Awarded to a player who stands alone against five or more enemy tanks or Tank Destroyers and wins. |  | Orlik's Medal
Awarded for destroying three or more enemy tanks or Tank Destroyers. The targets must be at least two tiers higher than the player's vehicle. |  | Oskin's Medal
Awarded for destroying three or more enemy vehicles with a medium tank. The targets must be at least two tiers higher than the player's tank. |  | Boelter's Medal
Awarded for destroying 7 or more enemy tanks and self-propelled guns with a tank or Tank Destroyer in one battle. The targets must be at least tier four or higher. |

Medals zijn zoals de achievements in veel andere games. Je hebt 4 gradaties per medal waarbij het oplopend in moeilijkheid is om ze te behalen.
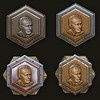 | Abrams' Medal
• Class IV - 10 victories
• Class III - 100 victories
• Class II - 1,000 victories
• Class I - 10,000 victories
| 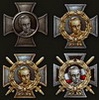 | Carius' Medal
• Class IV - destroy 10 vehicles
• Class III - destroy 100 vehicles
• Class II - destroy 1,000 vehicles
• Class I - destroy 10,000 vehicles
| 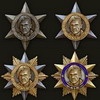 | Ekins' Medal
• Class IV - destroy 3 (tier 8, 9, 10) vehicles
• Class III - destroy 30 (tier 8, 9, 10) vehicles
• Class II - destroy 300 (tier 8, 9, 10) vehicles
• Class I - destroy 3,000 (tier 8, 9, 10) vehicles
| 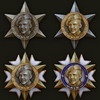 | Kay's Medal
• Class IV - battle hero 1 time
• Class III - battle hero 10 times
• Class II - battle hero 100 times
• Class I - battle hero 1,000 times
|  | Knispel's Medal
• Class IV - damaged 10,000 HP
• Class III - damaged 100,000 HP
• Class II - damaged 1,000,000 HP
• Class I - damaged 10,000,000 HP
|  | Lavrinenko's Medal
• Class IV - reducing 100 capture points of a friendly base
• Class III - reducing 1,000 capture points of a friendly base
• Class II - reducing 10,000 capture points of a friendly base
• Class I - reducing 100,000 capture points of a friendly base
| 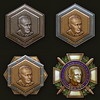 | Leclerc's Medal
• Class IV - 100 capture points
• Class III - 1,000 capture points
• Class II - 10,000 capture points
• Class I - 100,000 capture points
|  | Popel's Medal
• Class IV - detect 20 vehicles
• Class III - detect 200 vehicles
• Class II - detect 2,000 vehicles
• Class I - detect 20,000 vehicles
|

Special Achievements of Titles of Honor variëren een beetje in wat ze doen. De ene is net als een Medal en kun je maar één keer verkrijgen. Anderen werken met een combo's waarbij ook een record wordt bijgehouden.
 | Invincible
Survive 5 or more battles without taking any damage, not including battles fought using self-propelled guns (the icon displays the longest sequence). | 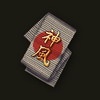 | Kamikaze
Destroy a higher-tier enemy vehicle by ramming it (the icon displays the number of tanks destroyed). This achievement is awarded whether the player survives the battle or not. |  | Master Gunner
Achieve at least five penetrating hits in a row against enemy vehicles. A miss, non-penetration or ricochet breaks the sequence (the icon displays the longest sequence). |  | Master Tanker
Destroy at least one of every type of enemy vehicles currently available in the game. |  | Mouse Trap
Destroy 10 or more Maus tanks (the icon displays the number of tanks destroyed). |  | Raider
Capture an enemy base without being detected during the entire battle (the icon displays the number of enemy vehicles that failed to detect the player). |  | Reaper
Destroy three or more enemy vehicles in a row with a single round each. The sequence will continue in the next battle even if the player's tank has been destroyed during the battle. A miss, non-penetration or non-destroying hit breaks the sequence (the icon displays the longest sequence). |  | Sharpshooter
Perform at least 10 hits in a row (the icon displays the longest sequence). |  | Survivor
Survive 20 or more battles in a row (not including battles fought using self-propelled guns). |  | Tank Hunter
Knock out 100 or more Jagdpanther, Jagdtiger, PzKpfw V Panther, Panther II, PzKpfw VI Tiger, PzKpfw IV, Tiger (P), PzKpfw VI Ausf. B Tiger II, Löwe, GW Panther, GW Tiger. |

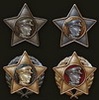
De Qualification Badges zijn de nieuwste achievements, geintroduceerd met patch 7.2. Deze badges worden verkregen voor het behalen van een average experience op een tank die hoger ligt dan de andere spelers op dezelfde tank in een specifieke tijdsperiode. De experience wordt gerekend zonder premium account of dubbel of tripel event bonus. Wanneer je er één behaald hebt op een tank zal de badge blijven staan totdat je een hogere badge weet te scoren (tenzij je al een Ace badge hebt behaald).
 | Class III badge - If your amount of experience received in battle is above the average of the top 50% of players driving this tank within the last seven days, then you gain the Class III badge. |  | Class II badge - If your amount of experience received in battle is above the average of the top 20% of players driving the same vehicle within 7 days, then you get the Class II badge. |  | Class I badge - If your amount of experience received in battle is above the average of the top 5% of players driving the same vehicle within 7 days, you get the Class I badge. |  | Master Driver badge - If you get into the top 1% of players (i.e. you established the best result of experience within 7 days), then you will achieve the Master Driver badge. |
| |
|
|
| 
Voor je tanks heb je aardig wat equipment tot je beschikking. Per tank kun je 3 verschillende stukken equipment kopen. Je moet dus voor jezelf afwegen wat nuttig is voor je tank of niet, equipment om bijv. je view range te verbeteren is zonde als je al bijna de max view range hebt (500m) want je kan niet voorbij de max. Er zijn 2 soorten equipment, equipment die je kan demounten en op een andere tank kan plaatsen en equipment die niet demountable zijn. Niet demountable equipment is te onderscheiden door het slotje in de afbeelding, wel kun je ze met ingang van patch v0.6.4 demounten voor 10 gold. Alle equipment kun je enkel met Credits kopen en de prijs is afhankelijk van het soort tank.
| De-Mountable Equipment |
|---|
| Type | Cost | Name |  | 100,000  | Camouflage Net | -25% from being Detected when the tank hull is stationary for 3 seconds.
Highly recommended equipment for Tank Destroyers and SPG classes. |
|  | 500,000 | Toolbox | +25% Repair speed.
The Toolbox is a good investment since it can be used on other tanks and it usually saves a lot of time in repairing of modules. Most people buy the Toolbox for faster repair of their tank's tracks: very important as an immobile tank is easy prey for SPG and sniping tanks. |
|  | 500,000 | Binocular Telescope | +25% View Range when tank hull is stationary for 3 seconds.
(Yes, View Range can go beyond 500m. See Battle Mechanics). Good equipment for the player who prefers sniping. |
| Permanent Equipment |
|---|
| Type | Cost | Name |  | Small - 50,000
Medium - 200,000
Large - 500,000 | Spall Liner | +15% Armor protection from ramming and explosions.
This includes High Explosive (HE) rounds from tanks and SPGs. The Liner is a good investment for heavy tanks since other low-tier tanks and SPGs will usually shoot HE shells and attempt to strip away your health through repeated hits. With this equipment installed, your tank is a bit more likely to survive without losing too much health. However, it doesn't decrease damage from Armor Piercing (AP) shells. |
|  | Class 1 - 200,000
Class 2 - 600,000 | "Wet" Ammo Rack | +50% Ammo Rack durability.
Buy this if you feel that your tank is very prone to ammo rack damage and ammo rack blow-ups. |
|  | 500,000 | Cyclone Filter | +50% Engine durability. Only for Soviet tanks.
Buy this if you feel your tank is very prone to engine damage. Also useful if you like to use a Removed Speed Governor. |
|  | 500,000 | Fill Tanks with C02 | +50% Fuel Tank durability.
Buy this if you feel that hits to the fuel tank are causing you problems. |
|  | Medium T - 200,000
Medium A - 300,000
Large T - 500,000
Large A - 600,000 | Rammer | -10% Loading Time.
The Rammer is a very popular piece of equipment for a good reason; it can make a real difference in combat. Highly recommended on every high tier tank and SPG.
A - Artillery | T - Tank |
|  | 500,000 | Enhanced Gun Laying Drive | -10% Aiming Speed when stationary.
This bonus is only applied when the player's tank has stopped moving. Good for heavy tanks and SPGs, since most of their guns have long aim times. |
|  | MK1 - 500,000
Mk2 - 600,000 | Vertical Stabilizer | +20% Accuracy while moving or rotating the turret.
An excellent piece of equipment for medium tanks and players that prefer offensive play. |
|  | 500,000 | Coated Optics | +10% View Range.
(Yes, View Range can go beyond 500m. See Battle Mechanics). The bonus is active at all times and is better suited for aggressive and scouting players. |
|  | 250,000 | Additional Grousers | +10% Speed on soft ground and +5% Speed on average soil. Only for German tanks.
This equipment increases off-road performance, so it's good for scout tanks, as they rely on speed. |
|  | Class 1 - 50,000
Class 2 - 150,000
Class 3 - 600,000 | Improved Ventilation | +5% to all Crew skills.
The bonus is still added even when all the crew have a 100% base skill, and multiplicative with the 10% bonus applied for having a Commander at 100% skill, resulting in a maximum of 116% skill for each crew member. |
|  | 20,000-600,000 | Enhanced Suspension | +10% suspension Load Limit.
There are many types of enhanced suspension, but they all do the same thing: increase the vehicle's suspension load capacity. This is probably the least used piece of equipment since the suspension on each tank's tech tree is usually more than enough to handle the tank's weight and equipment. This equipment doesn't improve acceleration, traverse rates, or anything else, it just increases max weight capacity. |
| |
|
|
| 
Ook zijn er zogenaamde consumables. Hier kun je, net als equipment, 3 stuks per tank kopen maar in tegen stelling tot equipment verbruik je ze en zul je ze na verbruik weer moeten aanschaffen. Naast deze verschillen is er ook nog het onderscheid in items voor credits en items voor gold waarbij de gold consumables vaak net wat beter zijn.
| Type | Cost | Name |  | 3000 | Small Repair Kit | | Repairs one chosen damaged module through the end of the match. Repaired module can still be damaged again after the repair. Only one track of two can be repaired. |
|  | 3000 | Manual Fire Extinguishers | | This consumable extinguishes fire when activated by the respective button when the tank catches fire. It can be a lifesaver for high tier tanks, but a bit of a waste for low tier tanks as they lack health to withstand even a few seconds of fire. |
|  | 3000 | Small First Aid Kit | | Heals an injured crew member until the end of battle. Healed crew member can still be re-injured or perish. |
|  | 5000 | Removed Speed Governor | | This consumable is never actually "consumed" (in other words, it is permanent): you simply turn it on/off to use it. It adds 10% to engine power (and therefore, vehicle acceleration), but the engine constantly sustains damage during its use. Even if the tank has full health at the end of the match, you will still have to pay for repairs since the removal of the speed governor decreases engine hitpoints. Repair costs vary between tiers and vehicles. Available only for Soviet vehicles. |
| 
 | 3000 | 100-Octane Gasoline
Lend-Lease Oil | Increases engine power (and therefore, vehicle acceleration) and turret traverse speed by 5% for a single match.
100-Octane Gasoline is only available for German and American vehicles with gasoline engines.
Lend-Lease Oil is only available for Soviet vehicles. |
|  | 50 | Large Repair Kit | | Repairs all currently damaged modules through the end of the match. Repaired modules can still be damaged again after the repair. |
|  | 50 | Automatic Fire Extinguishers | | Activates automatically 0.5 seconds after the tank catches fire and reduces the chance to catch fire by 10%. |
|  | 50 | Large First Aid Kit | | Heals all currently injured crew member through the end of the match. Healed crew members can still be re-injured or perish. |
|  | 50 | 105-Octane Gasoline | Increases engine power (and therefore, vehicle acceleration) and turret traverse speed by 10% for a single match.
Available only for German and American vehicles with gasoline engines. Note that there is no in-game difference between German and American oil. |
| 


 | 50 | Case of Coca-Cola
Chocolate
Extra Combat Rations
Strong coffee
Improved Combat Rations | Increases all crew skills by 10% for one entire match. This bonus is added even to crews that have a 100% base skill.
Case of Coca-Cola is only available for American vehicles.
Chocolate is only available for German vehicles.
Extra Combat Rations is only available for Soviet vehicles.
Strong coffee is only available for French vehicles.
Improved Combat Rations are only available for Chinese vehicles. |
| |
|
|
| 
Abby A large abbey and town fill the center of the map with three roads allowing passage from the north and south, and includes an elevated firing position in the abbey's courtyard at the highest point on the hill. West of the town is an elongated hill with several positions allowing fire down into the town. Further west and past the hill, a valley offers significant protection against artillery fire. East of the town lies a curved cliff road which affords shielding from most tank and artillery fire, but forces attackers to travel in a single path. A large abbey and town fill the center of the map with three roads allowing passage from the north and south, and includes an elevated firing position in the abbey's courtyard at the highest point on the hill. West of the town is an elongated hill with several positions allowing fire down into the town. Further west and past the hill, a valley offers significant protection against artillery fire. East of the town lies a curved cliff road which affords shielding from most tank and artillery fire, but forces attackers to travel in a single path. | Airfield Huge mountains and narrow valleys offer great advantages in a battle. You can engage in a fire duel across the gulf or enter a close quarter battle at the nearest port town or flank and capture enemy base. Huge mountains and narrow valleys offer great advantages in a battle. You can engage in a fire duel across the gulf or enter a close quarter battle at the nearest port town or flank and capture enemy base. | Arctic Region A large ice-and-snow covered area stretches through this map. Steep hills, rock encampments, twists and turns, and plenty of places to stay and wait will have you on your toes as you battle through this icy deathtrap. Ridge, hills, and lots of rocky outcrops give you many places to hide and ambush your enemy as they come about. Turns and twists could have you stuck if your not on your toes, so watch out. A large ice-and-snow covered area stretches through this map. Steep hills, rock encampments, twists and turns, and plenty of places to stay and wait will have you on your toes as you battle through this icy deathtrap. Ridge, hills, and lots of rocky outcrops give you many places to hide and ambush your enemy as they come about. Turns and twists could have you stuck if your not on your toes, so watch out. | Cliff Starting in the north and south, both teams are connected through a valley on the extreme west of the map. Large boulders offer cover south of the valley, and a small town provides cover to the north. The eastern portion of the map is elevated, with two large jutting hills providing cover from enemy fire. An overlooking position near the center of the map allows tanks to fire into the valley from above. Plentiful cover throughout the area allow for multiple attack routes, with careful coordination and flanking playing a significant role. Starting in the north and south, both teams are connected through a valley on the extreme west of the map. Large boulders offer cover south of the valley, and a small town provides cover to the north. The eastern portion of the map is elevated, with two large jutting hills providing cover from enemy fire. An overlooking position near the center of the map allows tanks to fire into the valley from above. Plentiful cover throughout the area allow for multiple attack routes, with careful coordination and flanking playing a significant role. | Dragon Ridge A varied rugged landscape is marvelous for its fascinating grandeur. A lake, bamboo bushes and mountain ridges make this map peculiar and unique. The map offers several options for directions of attack, each of them being advantageous in its own way. A varied rugged landscape is marvelous for its fascinating grandeur. A lake, bamboo bushes and mountain ridges make this map peculiar and unique. The map offers several options for directions of attack, each of them being advantageous in its own way. | El Halluf A large valley filled with rocks, vegetation, and a small village surrounding a dried out river bed separate the two teams. The large hills on either side of the valley offer many firing positions, and very little cover in the valley will protect a large tank completely against all positions. Regardless of approach, attackers will face a long climb into the enemy's camp, and effective use of the cover en route is essential. The northern approach offers plentiful protection to attack either hill, but the southern approach makes up for lack of protection with shorter distances and better concealment. A large valley filled with rocks, vegetation, and a small village surrounding a dried out river bed separate the two teams. The large hills on either side of the valley offer many firing positions, and very little cover in the valley will protect a large tank completely against all positions. Regardless of approach, attackers will face a long climb into the enemy's camp, and effective use of the cover en route is essential. The northern approach offers plentiful protection to attack either hill, but the southern approach makes up for lack of protection with shorter distances and better concealment. | Ensk A mixture of city outskirts and suburban areas with railroad tracks spanning and dividing this map. Plan your tactics to take advantage of defensive chokepoints and cover open areas with your vehicles. Artillery is great for deterring enemy breakthroughs, but remains almost defenseless when exposed to enemy vehicles attacking from cover. A mixture of city outskirts and suburban areas with railroad tracks spanning and dividing this map. Plan your tactics to take advantage of defensive chokepoints and cover open areas with your vehicles. Artillery is great for deterring enemy breakthroughs, but remains almost defenseless when exposed to enemy vehicles attacking from cover. | Erlenberg A large river splits this map in half, with three bridges acting as chokepoints between the halves. A small town surrounds the center bridge, while the north and south bridges have fewer buildings providing cover. A large castle overlooks the west half of the map on a large hilltop, offering cover and supporting fire positions. Hills overlook the city in the east, with sufficient vegetation to provide some concealment for tanks. A large river splits this map in half, with three bridges acting as chokepoints between the halves. A small town surrounds the center bridge, while the north and south bridges have fewer buildings providing cover. A large castle overlooks the west half of the map on a large hilltop, offering cover and supporting fire positions. Hills overlook the city in the east, with sufficient vegetation to provide some concealment for tanks. | Fisherman's Bay The map is a combination of open spaces and irregular terrain. Meandering narrow streets of the seaport on the flank can be surprisingly advantageous. Sloping hills covered with bushes offer excellent ambush opportunities. The map is a combination of open spaces and irregular terrain. Meandering narrow streets of the seaport on the flank can be surprisingly advantageous. Sloping hills covered with bushes offer excellent ambush opportunities. | Fjords Huge mountains and narrow valleys offer great advantages in a battle. You can engage in a fire duel across the gulf or enter a close quarter battle at the nearest port town or flank and capture enemy base. Huge mountains and narrow valleys offer great advantages in a battle. You can engage in a fire duel across the gulf or enter a close quarter battle at the nearest port town or flank and capture enemy base. | Highway The diverse landscape of this map makes it peculiar and complex, and also encourages a wide range of tactics. Multiple defilades are favorable for surprise attacks, while the city blocks are advantageous for close combat. The diverse landscape of this map makes it peculiar and complex, and also encourages a wide range of tactics. Multiple defilades are favorable for surprise attacks, while the city blocks are advantageous for close combat. | Himmelsdorf Literally translated as "sky village" from German, this labyrinth of streets and squares are a large hindrance for artillery and tank destroyers, but ideal for speedy breakthrough and bypass by medium and light vehicles. With the castle dominating the area, access roads running by the hill and along the railway lines to help you out of the impasse. Literally translated as "sky village" from German, this labyrinth of streets and squares are a large hindrance for artillery and tank destroyers, but ideal for speedy breakthrough and bypass by medium and light vehicles. With the castle dominating the area, access roads running by the hill and along the railway lines to help you out of the impasse. | Karelia Swamps, rocks, and cliffs determine major avenues of approach on this map. This map, with sparse protection and no buildings, gives the combat advantage to artillery. Concentrate your attacks along the path of your main advance, while conducting delaying and defensive actions along the rest of your front lines. Swamps, rocks, and cliffs determine major avenues of approach on this map. This map, with sparse protection and no buildings, gives the combat advantage to artillery. Concentrate your attacks along the path of your main advance, while conducting delaying and defensive actions along the rest of your front lines. | Komarin A unique map in that the teams do not start near the flags, Komarin offers multiple tactical options. The teams start in the north and south, divided by rivers offering three routes. The center route is a large, elevated, and wooded island connected by bridge to the south, and offers firing positions to nearly the entire map, but at the cost of being exposed if spotted. A small village on both the west and east side of the map offer attackers valuable cover en route to the flag, but leave any tank passing the village exposed to covered and concealed defenders once they leave the village. A unique map in that the teams do not start near the flags, Komarin offers multiple tactical options. The teams start in the north and south, divided by rivers offering three routes. The center route is a large, elevated, and wooded island connected by bridge to the south, and offers firing positions to nearly the entire map, but at the cost of being exposed if spotted. A small village on both the west and east side of the map offer attackers valuable cover en route to the flag, but leave any tank passing the village exposed to covered and concealed defenders once they leave the village. | Lakeville An isolated mountain valley on one flank and city blocks on the other allow you to thrust close to the enemy. A large lake in the middle gives long-range weapons a clear field of fire. An isolated mountain valley on one flank and city blocks on the other allow you to thrust close to the enemy. A large lake in the middle gives long-range weapons a clear field of fire. | Live Oaks In the centre of the map there is a large bog lake. A railway bridge and a fording side on the one flank allow to defend the area using scarce forces, and to concentrate main forces on the other flank. The town to the North provides sufficient cover from artillery to the team that controls it. In the centre of the map there is a large bog lake. A railway bridge and a fording side on the one flank allow to defend the area using scarce forces, and to concentrate main forces on the other flank. The town to the North provides sufficient cover from artillery to the team that controls it. | Malinovka Initial staging areas are separated by a wide open field, ideal for artillery and defensive operations. Make use of flanking maneuvers and natural defenses like woods, hills, and farmhouses, as these can be decisive. Another option is a well-coordinated high-speed combined arms attack across the field which could bring victory, but at the risk of a bloody loss. Initial staging areas are separated by a wide open field, ideal for artillery and defensive operations. Make use of flanking maneuvers and natural defenses like woods, hills, and farmhouses, as these can be decisive. Another option is a well-coordinated high-speed combined arms attack across the field which could bring victory, but at the risk of a bloody loss. | Mines A flat hilltop in the center of this map provides an excellent firing position, but the short drive from either starting position makes climbing the hill a dangerous endeavor. Nestled in the canyon northeast of the hill is the small village of Pagorki; offering a tempting route with plenty of cover, but one that is exposed if the enemy controls the hill. West of the hill, surrounded by shallow water, is a small island which offers good cover while providing a large fire zone. While the island is protected from the hill, it is, for the most part, vulnerable to flanking attacks or fire from multiple angles. The island cover is solid, but not particularly large. A flat hilltop in the center of this map provides an excellent firing position, but the short drive from either starting position makes climbing the hill a dangerous endeavor. Nestled in the canyon northeast of the hill is the small village of Pagorki; offering a tempting route with plenty of cover, but one that is exposed if the enemy controls the hill. West of the hill, surrounded by shallow water, is a small island which offers good cover while providing a large fire zone. While the island is protected from the hill, it is, for the most part, vulnerable to flanking attacks or fire from multiple angles. The island cover is solid, but not particularly large. | Mountain Pass The Mannerheim Line was a defensive fortification line on the Karelian Isthmus built by Finland against the Soviet Union. During the Winter War of 1939-1940 it became known as the Mannerheim Line, after Field Marshal Baron Carl Gustaf Emil Mannerheim. The line was constructed in two phases: 1920–1924 and 1932–1939. The Mannerheim Line was a defensive fortification line on the Karelian Isthmus built by Finland against the Soviet Union. During the Winter War of 1939-1940 it became known as the Mannerheim Line, after Field Marshal Baron Carl Gustaf Emil Mannerheim. The line was constructed in two phases: 1920–1924 and 1932–1939. | Murovanka A small town dominates the center of the map, with a large forest providing concealment in the east and high ground to the west. The forest provides effective concealment, but lacks cover from fire; whereas the town has plentiful cover, but lacks concealment. A small town dominates the center of the map, with a large forest providing concealment in the east and high ground to the west. The forest provides effective concealment, but lacks cover from fire; whereas the town has plentiful cover, but lacks concealment. | Port The setting is an industrial area of a port city. Teams begin the battle surrounded by factory buildings, warehouses, and docks. An open space in the center of the map consists of a hilly, open area and railroad tracks. Train cars can provide cover during combat. The most direct route to the enemy base is along the two highway bridges above the railway tracks. Common tactics on this map might include ambush and firing from defilade positions. Surprise attacks to the enemy's rear can break a deadlock. The setting is an industrial area of a port city. Teams begin the battle surrounded by factory buildings, warehouses, and docks. An open space in the center of the map consists of a hilly, open area and railroad tracks. Train cars can provide cover during combat. The most direct route to the enemy base is along the two highway bridges above the railway tracks. Common tactics on this map might include ambush and firing from defilade positions. Surprise attacks to the enemy's rear can break a deadlock. | Prokhorovka Generally open, but hilly, terrain around a vital railroad, with groups of trees providing shelter for tank destroyers. On the offensive, watch your own flanks while striking against the enemy flanks. Artillery has free reign, although it is still vulnerable to raids by light vehicles. Generally open, but hilly, terrain around a vital railroad, with groups of trees providing shelter for tank destroyers. On the offensive, watch your own flanks while striking against the enemy flanks. Artillery has free reign, although it is still vulnerable to raids by light vehicles. | Province Hills on the periphery of the map are covered with numerous houses and winding streets advantageous for suprise attacks. An open area between the bases is favorable for daring strikes. Hills on the periphery of the map are covered with numerous houses and winding streets advantageous for suprise attacks. An open area between the bases is favorable for daring strikes. | Redshire A rolling area, dominated by a couple of hills. The village of Redshire gives places to hide from hill to its northeast. Artillery will play a powerful role on this map. A rolling area, dominated by a couple of hills. The village of Redshire gives places to hide from hill to its northeast. Artillery will play a powerful role on this map. | Ruinberg Concentric city streets, along with dense forests and bushes in the overgrown park allow for hidden maneuvers and redeployment of your troops. Although artillery fire is of limited use in the city, the debris provides effective cover for your troops. Concentric city streets, along with dense forests and bushes in the overgrown park allow for hidden maneuvers and redeployment of your troops. Although artillery fire is of limited use in the city, the debris provides effective cover for your troops. | Sandriver A mostly open map offering little concealment, but providing plentiful cover due to the large number of sand dunes. Three small villages provide temporary cover at best, but are easily destroyed, so they must be used cautiously. Each flag is well protected with a ridge offering defenders cover, concealment, and excellent firing positions. Plentiful cover allows an excellent arena for run and gun tactics while offering many routes for tanks to engage the enemy and make use of their mobility. A mostly open map offering little concealment, but providing plentiful cover due to the large number of sand dunes. Three small villages provide temporary cover at best, but are easily destroyed, so they must be used cautiously. Each flag is well protected with a ridge offering defenders cover, concealment, and excellent firing positions. Plentiful cover allows an excellent arena for run and gun tactics while offering many routes for tanks to engage the enemy and make use of their mobility. | Serene Coast This coastal area is bounded by ocean and mountains. A railroad crosses the territory from north to south. Woody hills on the western flank are favorable for a swift attack. A straight road connecting the bases passes through a small town, which often becomes a contested piece of terrain. The bases are protected by the hills from direct attacks. However, the flanks of the bases are insecure and must be protected. This coastal area is bounded by ocean and mountains. A railroad crosses the territory from north to south. Woody hills on the western flank are favorable for a swift attack. A straight road connecting the bases passes through a small town, which often becomes a contested piece of terrain. The bases are protected by the hills from direct attacks. However, the flanks of the bases are insecure and must be protected. | Siegfried Line A wonderfull map combining the best of both worlds. The west side is open fields with little cover, excellent for quick flanks around the side for those looking for an early victory. To the east, the town offers concealment and cover for those brave enough to enter its confines. A wonderfull map combining the best of both worlds. The west side is open fields with little cover, excellent for quick flanks around the side for those looking for an early victory. To the east, the town offers concealment and cover for those brave enough to enter its confines. | Steppes A seemingly endless open expanse of fields and hills, scattered through this farmland-esque map. Open fields, varying ditches, and small hills and rises litter this map, allowing for some prime spots to lay ambushes. Long, open fields are great for those who prefer long-distance combat, with little cover available to your target. Just remember; This works both ways. A seemingly endless open expanse of fields and hills, scattered through this farmland-esque map. Open fields, varying ditches, and small hills and rises litter this map, allowing for some prime spots to lay ambushes. Long, open fields are great for those who prefer long-distance combat, with little cover available to your target. Just remember; This works both ways. | South Coast On this rugged-terrain map, make use of various battlefield tactics: flank or ambush the enemy, or attack straight ahead. Also use numerous hollows between the rocks for a busting attack with concentrated forces. On this rugged-terrain map, make use of various battlefield tactics: flank or ambush the enemy, or attack straight ahead. Also use numerous hollows between the rocks for a busting attack with concentrated forces. | Swamp Flank routes offer great opportunities for surprise attacks and diversionary operations. A mire in the center is not only an obstacle, but also an important tactical location. Flank routes offer great opportunities for surprise attacks and diversionary operations. A mire in the center is not only an obstacle, but also an important tactical location. | Westfield A wonderfully lush area, Westfield features forests, fields, farmland, and multiple villages throughout the map. Included is a large war-damaged bridge crossing the eastern valley. Plentiful ridges give ambush positions along nearly every route, and large fields can leave a tank vulnerable when moving between positions. A wonderfully lush area, Westfield features forests, fields, farmland, and multiple villages throughout the map. Included is a large war-damaged bridge crossing the eastern valley. Plentiful ridges give ambush positions along nearly every route, and large fields can leave a tank vulnerable when moving between positions. | Widepark Opposing bases on this map are separated by cliffs and rocky ridges. A variety of cover allows for focused attacks in crucial directions. The direct route may seem ideal for a breakthrough assault, but do not neglect your flanks! Opposing bases on this map are separated by cliffs and rocky ridges. A variety of cover allows for focused attacks in crucial directions. The direct route may seem ideal for a breakthrough assault, but do not neglect your flanks! |
| |
|
|
| 


| |
|
|
|  Trailers
[YouTube: http://youtu.be/4aKEop8R1GM?hd=1]
[YouTube: http://youtu.be/DtIjQfuGUk0?hd=1]
[YouTube: http://youtu.be/qy1jMUv_N4w?hd=1]
Tutorials
[YouTube: http://www.youtube.com/watch?v=VIVFALdUK9E&hd=1]
| |
|
|
| 
Welke tree wordt jouw main tree? |
 Ook een poll maken? Klik hier
Wat is de beste light scout? |
Heb je ooit gold gebruikt en/of gebruik je het nog steeds? |
Wat is jou mening over artillery? |
Heb jij al een franse tank? |
| |
|
|
| 
| |
|
|
|
|
| 
Hier vind je een compilatie van de meest gevraagde en/of gebruikte mods voor World of Tanks:
| |
|
|
| 
Uiteraard is er ook een heuse World of Tanks GoT clan bestaande uit 2 clans:
World of Tanks clan - Gathering of Tweakers | Actievere leden
World of Tanks clan - Gathering of Tweakers 2 | Casual/Leveling/Fun
Wil je hierin komen en voldoe jij aan de eisen stuur dan een invite via een van de bovenstaande links en geef daarbij aan wat je tweakers nick is. Meld je eveneens aan op het clanforum (zie hieronder).
Om de clans wel met elkaar te kunnen chatten is er het ingame Gathering of Tanks channel opgezet. Deze zal je elke keer joinen zolang je de channel niet wegklikt (al kan het nu spontaan verdwijnen door een bug waar de devs vanaf weten).
Tevens om het topic niet te vervuilen met allemaal clan chat is er een extern forum opgezet. Zit je in een GoT clan dan kun je je aanmelden. Probeer wel eenzelfde nick te nemen als ingame of op tweakers zodat we weten wie we toelaten en niet. Het forum is er tevens om je op de hoogte te houden van de clanbattles dus belangrijk voor degene die mee (willen) doen met clan wars! Het forum vind je hier: Gatheringoftanks.nl - [GoT] Forum.
Daarnaast maakt GoT gebruik van TS3 om met elkaar te kunnen communiceren, overleggen en ouwehoeren. Iedereen is welkom maar we verwachten wel dat men zich gedraagt. Details zijn te vinden op het clanforum en enkel voor leden van de Gathering of Tanks clan.
| |
|
|
| 
| |
|
|
| 
Deze topicstart is gemaakt door Annihilism en psychoclown en is nog onderhevig aan veranderingen. Mocht je suggesties hebben of fouten vinden laat het weten via DM psychoclown!
Wil je in de playertable stuur psychoclown dan een DM met je WoT profiellink!- Annihilism bedankt voor het openen en opzet van het allereerste deel.
- Zimmer bedankt voor het schrijven van de opzet van het crew stuk.
| |
|
[
Voor 9% gewijzigd door
psychoclown op 16-12-2012 12:41
]
:fill(white):strip_exif()/i/1331308426.jpeg?f=thumbmini)


/u/350900/cthullu-small.JPG?f=community)
:strip_exif()/u/184768/boxing.gif?f=community)
:strip_exif()/u/266439/crop67b0fda9d8ed7.gif?f=community)
:strip_icc():strip_exif()/u/78812/Piyote%252009.jpg?f=community)

/u/257711/307274.png?f=community)
:strip_icc():strip_exif()/u/176302/mefora.jpg?f=community)
:strip_icc():strip_exif()/u/193349/Naamloos-1.jpg?f=community)
:strip_icc():strip_exif()/u/182109/68-2.jpg?f=community)
:strip_exif()/u/31249/Beetle2.gif?f=community)
:strip_icc():strip_exif()/u/141382/tweakjerommeke.jpg?f=community)


:strip_icc():strip_exif()/u/211719/crop56684a0a37c1c_cropped.jpeg?f=community)
:strip_icc():strip_exif()/u/85747/crop5e3491f382a9e_cropped.jpeg?f=community)
:strip_icc():strip_exif()/u/266752/wish1.jpg?f=community)
/u/176257/crop6322c7355c057_cropped.png?f=community)
